Children of all ages, abilities, and interests can enjoy sensory play; these can include everything from sensory bottles to fidget/pop toys. Sensory activities help children regulate their emotions, manage stress, and embrace creativity. Sensory bottles are easy to DIY with a bit of guidance and can be long-lasting when made well.
What Is a Sensory Bottle?
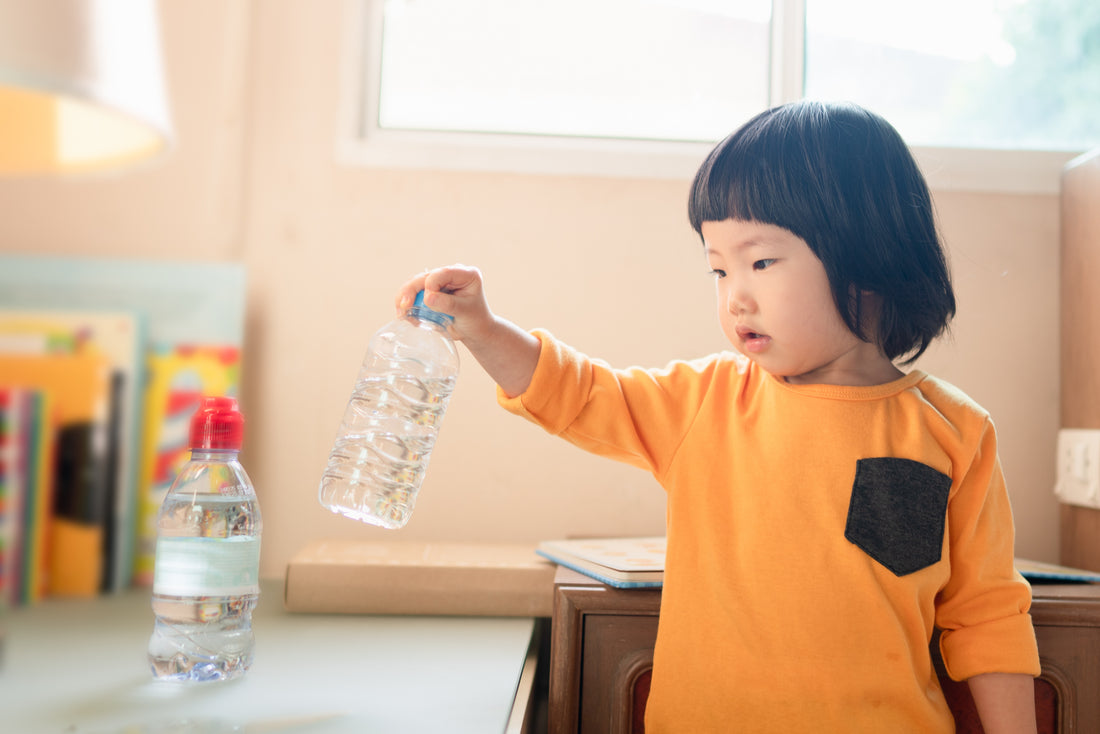
Sensory bottles, also known as discovery bottles or calm-down bottles, are containers filled with various materials that provide visual stimulation and a calming experience when shaken, played with, or observed. They can benefit all children but are specifically helpful for children with sensory sensitivities.
Sensory bottles can be made with an empty water bottle or any clear type of bottle or container. As long as the child can see inside and the container can close tightly, you can be pretty flexible with the bottle you choose.
There really are no limits to what can go in a sensory bottle as long as the object won’t dissolve in the liquid. The idea is that children can shake them and see what’s inside, so you want to keep the liquid light enough to see into.
Materials can appeal to your child’s interests or preferences. For example, if your child loves the beach, you may make a sensory bottle with sand and water that is beach themed to enhance its calming effect. The possibilities are endless.
What Are the Benefits of Sensory Bottles?
Sensory bottles create a mesmerizing visual experience with a combination of shapes, colors, and materials that are captivating to watch while they float around and settle. They also allow children to explore different textures in a controlled, no-pressure manner.
Sensory bottles can help with a child’s focus, relaxation, and emotional regulation. They are the perfect on-the-go sensory toy since they’re small and portable. These bottles can be enjoyed by people of all ages, providing a versatile tool to fulfill sensory needs.
Sensory bottles provide a multisensory experience, appealing to multiple senses at once. The combination of colors, textures, and objects promotes sensory exploration and integration.
Additionally, the use of sensory bottles can also help to develop fine motor skills. Playing with them often involves gripping, shaking, turning, or manipulating the bottle, which can strengthen both fine motor skills and enhance hand-eye coordination.
Even more so, these bottles enhance cognitive development by encouraging problem-solving, observation, and exploration. Children can analyze the various materials, make predictions, and flex their critical thinking muscles.
Children are given a safe and contained environment for sensory exploration, allowing them to freely experiment, discover, and satisfy their curiosity.
Sensory Bottle Ideas: 5 Easy Types To Make
How To Make a Glitter Sensory Bottle
Supplies:
• A clear plastic or glass bottle with a secure lid
• Water
• Clear glue (super glue or hot glue recommended)
• Corn syrup (or baby oil)
• Glitter (color and size to your preference)
• Food coloring or liquid watercolor
• Optional: sequence or any other shiny material to add flair
Get Started:
1. Start with an empty, clean, and dry bottle. Remove any labels or stickers so the entire bottle is transparent.
2. Fill about two-thirds of the way with water, leaving room at the top for movement.
Bring in the Color
3. Mix in drops of food coloring. Close the bottle and gently stir or shake until the coloring is evenly distributed. As a tip, less is best.
Don't let the water get too dark: Start with a drop or two. It’s easier to add more than to remove. If the water does get too dark, pour some out in the sink and fill it with regular water to try to even the color out. (This may take some trial and error.)
Add the Soap
4. Add the liquid starter: ½ corn syrup and ½ water. This slows down the movement of the glitter so it doesn’t all drift to the bottom and creates a more mesmerizing effect. Again, start small (maybe one to two tablespoons) and add more if needed. Return to this step to add more later if you find it doesn’t have the desired effect.
Add Glitter
A single color lends itself to a cool, calming effect, or perhaps you'll blend dynamic shapes and colors to make it more vibrant.
Secure the Lid
6. Secure the lid tightly to prevent leaks or spills. Gently shake your bottle to see how the glitter moves and settles. If you need to repeat a previous step or add anything new, now’s the time to do it.
7. Secure the lid with super glue or a hot glue gun: Your glitter sensory bottle is ready to enjoy!
How To Make an Ocean Sensory Bottle
Supplies:
• A clear plastic or glass bottle with a secure lid (or you may opt to use a jar for this one.)
• Water
• Clear glue (super glue or hot glue recommended)
• Clear liquid soap — hand soap will do (some prefer clear hair gel for this one)
• Blue food coloring
• Glitter (fine glitter is better — blue or silver)
• Sand or mini pebbles
• Optional, but strongly recommended: seashells, mini plastic sea creatures, or ocean stickers

Get Started
1. Select your desired bottle or jar and double-check that all labels and stickers are removed. Wash and dry the bottle.
2. Fill about two-thirds of the way with water — maybe even a little less, based on how much you intend to add to it. Leave room at the top for movement and to add items without overflow.
Add the Color
3. Add a few drops of blue food coloring to the water. You want to gauge how dark you want the water to be. The more food coloring, the darker. You can mix a few shades of blue or even add a drop of green to create a more ocean-like color if you wish.
4. Add one to two tablespoons of clear liquid soap to slow down the movement of the objects you will later add inside. The slower and calmer you want your bottle to be, the more soap you should add. You can adjust to add more later if need be.
Add a Splash of Personality
5. Sprinkle or funnel some glitter into the bottle. Don’t use too much, but eye it as best you can to create the effect that sunlight is shimmering on the water.
6. Add sand slowly into the bottle or jar. This should sink to the bottom, but you don’t want it to splash, so take your time. Going slow here lets you gauge how much sand you want at the bottom.
7. Optional: If you want to add seashells, plastic ocean animals, loom bands, or small toys, now is the time to do it. Put in one item at a time and watch for splashing and overflow.
Close and Tighten
8. Close the bottle tightly and slowly. Move it around to ensure it's flowing how you want it to. If your objects are shaking up too quickly, add more soap. If the water is too light, add more food coloring. Now is the time to make any changes you desire.
9. Optional: Add ocean stickers or printable ocean features outside the bottle to create a little flair and detail.
10. Once you have the perfect blend of ocean materials in your sensory bottle, glue the lid shut with superglue or hot glue. Your mesmerizing beach experience is ready to be explored.
Short on time or looking for a larger ocean sensory toy? Check out this Collapsable Ocean Sensory Bin with absorbent beads. Perfect for children over the age of 36 months.
How To Make a Confetti Sensory Bottle
Supplies:
• A clear plastic or glass bottle with a secure lid
• Water
• Clear glue (super glue or hot glue recommended)
• Clear liquid soap (hand soap will do)
• Confetti, sequins, or both. You decide on the desired color and size.
• Optional: food coloring (A tip: If you had a wide variety of colors in the confetti itself, you might opt out of using food coloring. For a themed bottle with one or two colors of confetti, pick a coordinating food coloring to make it pop.)
Steps
-
Clean and dry your bottle, removing any stickers or labels. Fill about three-quarters of the way with water.
-
If you want to add food coloring to the water, do that first. Try just one or two drops to add a little color without making it too dark. The confetti itself will add a lot of pizazz later.
-
Add clear soap (one to two tablespoons) to create a calming effect and make the items in your bottle move at a slower, more calming pace. This makes it visually captivating, but you may not want too much. Start small and add more later if desired.
-
Sprinkle confetti, sequins, or both into the bottle. Decide how much you want and the variety of colors desired. A variety of shapes can add to the vibrance of your bottle.
-
Tightly close the bottle and test it out. If the items are falling to the bottom too quickly, add more soap. If you want a darker color or more confetti, add those in. Add little amounts at a time to avoid overdoing it.
-
Once your bottle looks flawless, glue the lid shut to complete it. Now it’s to enjoy your new sensory bottle!
A few additional tips for a confetti sensory bottle: These are great ones to theme. You can use holiday colors and confetti for different times of the year. For example, heart sequins, red and pink confetti, and a dot or two of red food coloring make an adorable Valentine’s Day bottle. Green food coloring with plastic clovers and green confetti or sequins are fun for St. Patty’s Day.
How To Make a Discovery Bottle
Discovery bottles change things up a bit as they don’t require water and are more texture-based. These are great for auditory-inclined children, as they often can double as noise makers.
Supplies
• A clear plastic bottle with a secure lid
• Various mini objects for discovery (suggestions: buttons, beads, pompoms, ribbons, dry corn, Legos, alphabet beads, etc.)
• Rice, sand, or other sort of filler
Steps
-
Start with a clean, dry bottle. Remove any stickers or labels.
-
Decide on a theme or concept for your discovery bottle. You don’t want too many random objects that make it too busy. You can pick a color scheme, texture theme, or anything based on your child's interests.
-
Choose your variety of miniature objects based on that theme. You can vary the sizes, textures, and objects to add to the diversity of this sensory experience. These objects will be the things your child is “discovering.”
-
Add the filler to create texture and an additional sensory dimension. You don’t want so much that it makes your objects hard to find, so be cautious with this step. It’s easier to add more later than it is to take away.
-
Add the objects to your bottle one by one, leaving room at the top for movement. As a general rule, the more room you leave, the more sound can be made. You want space for the objects to interact when shaken.
-
Secure the lid and check out your discovery bottle. If you’re happy with the quantities of all items, glue it shut and get to playing.
If your child loves their discovery bottle, you might want to introduce something like the Kinetic Sand Box for a more hands-on type of sensory experience.
How To Make a “Lava Lamp” Bottle
First released in 1963, the lava lamp is the original “calm down jar,” but it runs hot, making it unsafe to leave around curious toddlers and children. This new interpretation is just as fun and visually captivating but is safer. While it does not produce real lava lamp effects, it creates a similar “floating goo” illusion.
Supplies:
• A clear plastic or glass bottle with a secure lid
• Water
• Vegetable oil or cooking oil
• Alka-seltzer tablets
• Food coloring
• Optional: glitter, mini beads, or water beads (disclaimer: water beads expand. Use sparingly)
Steps:
-
Remove all stickers and labels with warm water, and begin with a clean, dry bottle.
-
Fill the bottle only one-third full with water. Add a drop or two of food coloring based on your desired color.
-
Add enough vegetable oil to fill it nearly to the top. Leave a small gap to allow the movement of materials.
-
Optional: If you want to add sparkle to your lava lamp effect, add any glitter or tiny metallic beads now. Some prefer the effect without — this is totally your preference.
-
Break up an Alka-seltzer tablet into small pieces. Drop one piece into the bottle and observe the reaction. It should fizz and create rising bubbles.
-
Once those bubbles start to slow down, add another piece of the tablet. Repeat as desired to keep the movement going.
-
Secure the lid and glue it down with superglue or hot glue.
-
Gently tilt and shake your bottle to observe the bubbles rise and move through the oil, creating a lava lamp effect.
If the lava lamp bottle is a winner in your household, the Weighted Gel Maze might prove a handy companion to your child’s toy chest. It combines the gel-type sensory experience with the calming pressure of 2.2 pounds of targeted deep-pressure therapy.
Final Thoughts on Sensory Play
Sensory play is a vital part of childhood development. It is a soothing way for children to explore the world around them. This type of play is inclusive and accessible to all and can be adapted in many different ways to accommodate needs and preferences.
Sensory play stimulates creativity and the use of imagination. It enhances motor skills and encourages language and communication development. Helping a child learn ways to self-regulate through sensory activities is a lifelong tool.
Try these DIY sensory ideas, or check out some ready-to-use sensory items from Big Heart Toys. You’ll be glad you did!
Sources:
Sensory Issues | Autism Speaks
What Is Cognitive Development | Help Me Grow MN
Guide to inclusive play | Sensory Trust
Autism Spectrum Disorder: Communication Problems in Children | NIDCD